Add the Parts Diagram Block
The Parts Diagram block is a Shopify Theme App Extension. It works on any Online Store 2.0 theme — every theme in the Shopify Theme Store published after mid-2021 qualifies.
This is a one-time setup per theme. Once added, the block automatically shows the correct diagram on every product page that has an assignment.
Steps
1. Open the theme editor
In Shopify Admin, go to Online Store → Themes. Find your active theme and click Customize (or Edit theme).
2. Switch to a product template
At the top of the customizer, click the template selector (it shows "Home page" by default) and choose Products → Default product.
The preview switches to a product page layout, and the left panel shows the sections and blocks for that template.
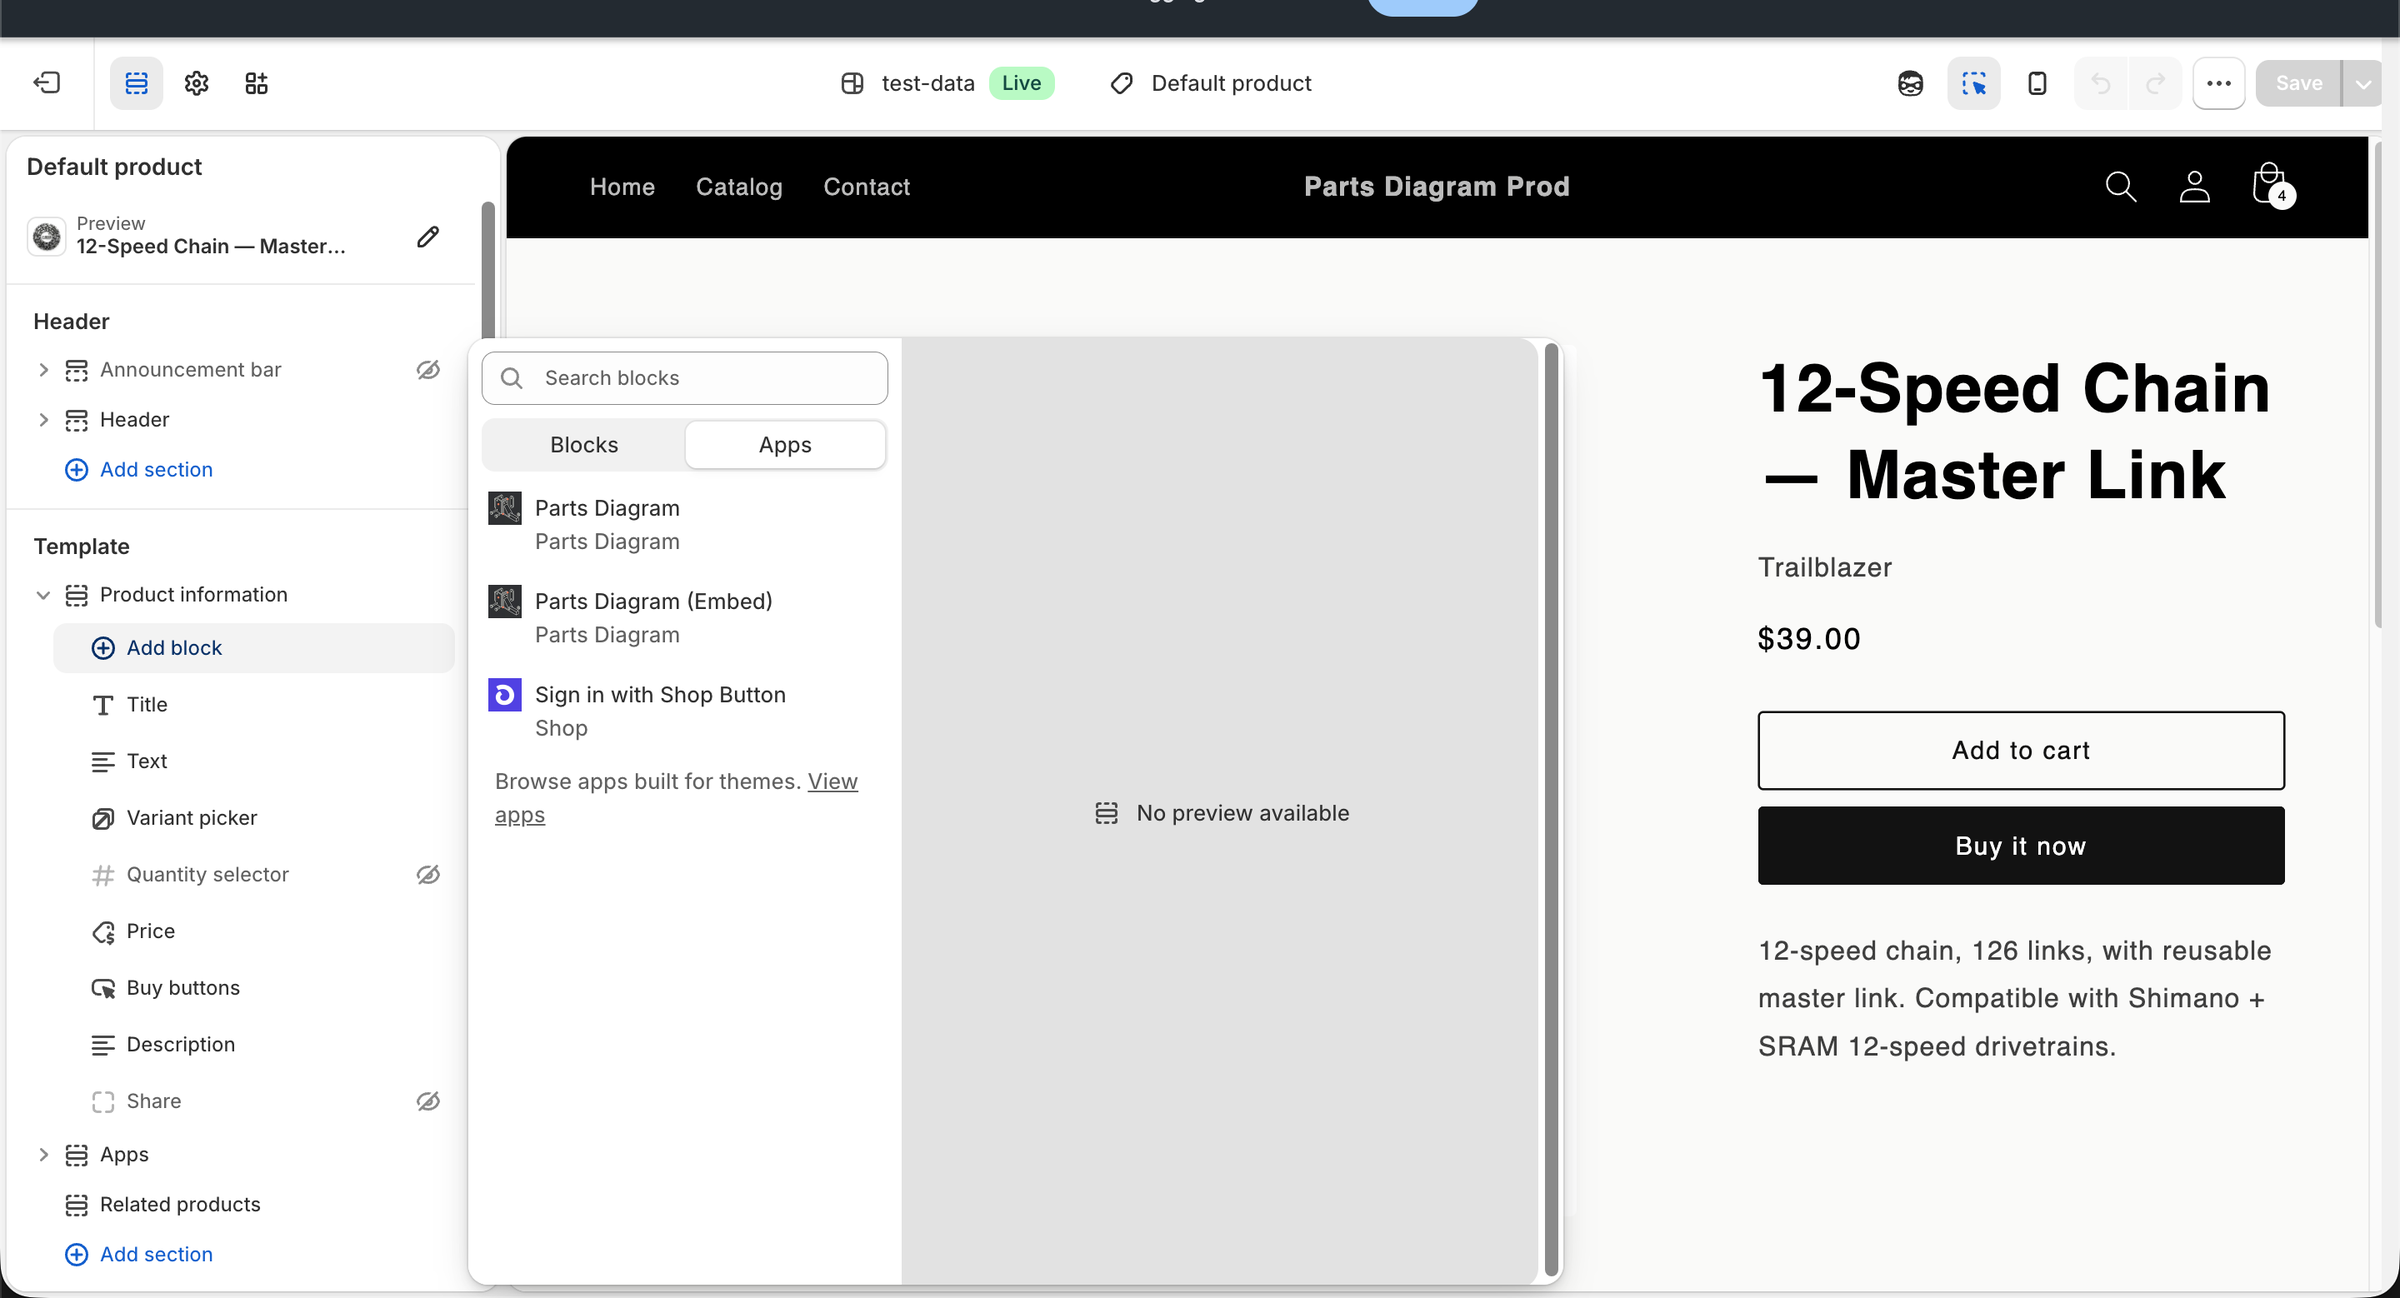
3. Add the Parts Diagram block
- In the left panel, expand the Product information section by
clicking the
>arrow next to it. - Click Add block (the
+icon that appears). - In the block picker that opens, click the Apps tab.
- Click Parts Diagram to add the block.
4. Position the block
After the block is added, drag it to the position you want within the Product information section. Most stores place it:
- Below the product gallery — the diagram is the first thing below the images, before the price and buttons.
- Below the Add-to-cart button — the diagram supplements the product description rather than leading with it.
5. Save
Click Save at the top right of the customizer.
The block now renders on every product page using that template.
Multiple product templates
If your theme has several product templates (for example, Default, Featured, Apparel), repeat the steps above for each template where you want diagrams to appear. Theme block placements are template-specific.
Removing the block
Open the same template in the customizer, find the Parts Diagram block
in the left panel, click the ⋮ menu next to it, and choose Remove.
Click Save.
Removing the block does not delete your diagrams
Your diagrams, hotspots, and assignments remain intact. You can re-add the block at any time to bring them back.
Troubleshooting
If Parts Diagram does not appear in the Apps tab:
- Confirm the app is installed: go to Shopify Admin → Apps and check that Parts Diagram is listed.
- Confirm you are editing a product template, not a collection or home page template. App blocks only appear inside product templates.
- If you're on a custom or heavily modified theme, check that your product
section declares
"target": "section"support for app blocks. Contact your theme developer if not.
See the full Theme Editor troubleshooting guide for more detail.