Your First Diagram
A complete walkthrough — from blank slate to a live, clickable diagram on your storefront. Allow ~10 minutes if your product and diagram image are already prepared.
What you need before you start
- A diagram image — a flat illustration or exploded-view photo of the product you want to make interactive. PNG or JPG, ideally 1200 px wide or larger.
- The Shopify products that each part should link to. They must already exist in your catalog (the app does not create products).
Step 1 — Open the Diagrams page
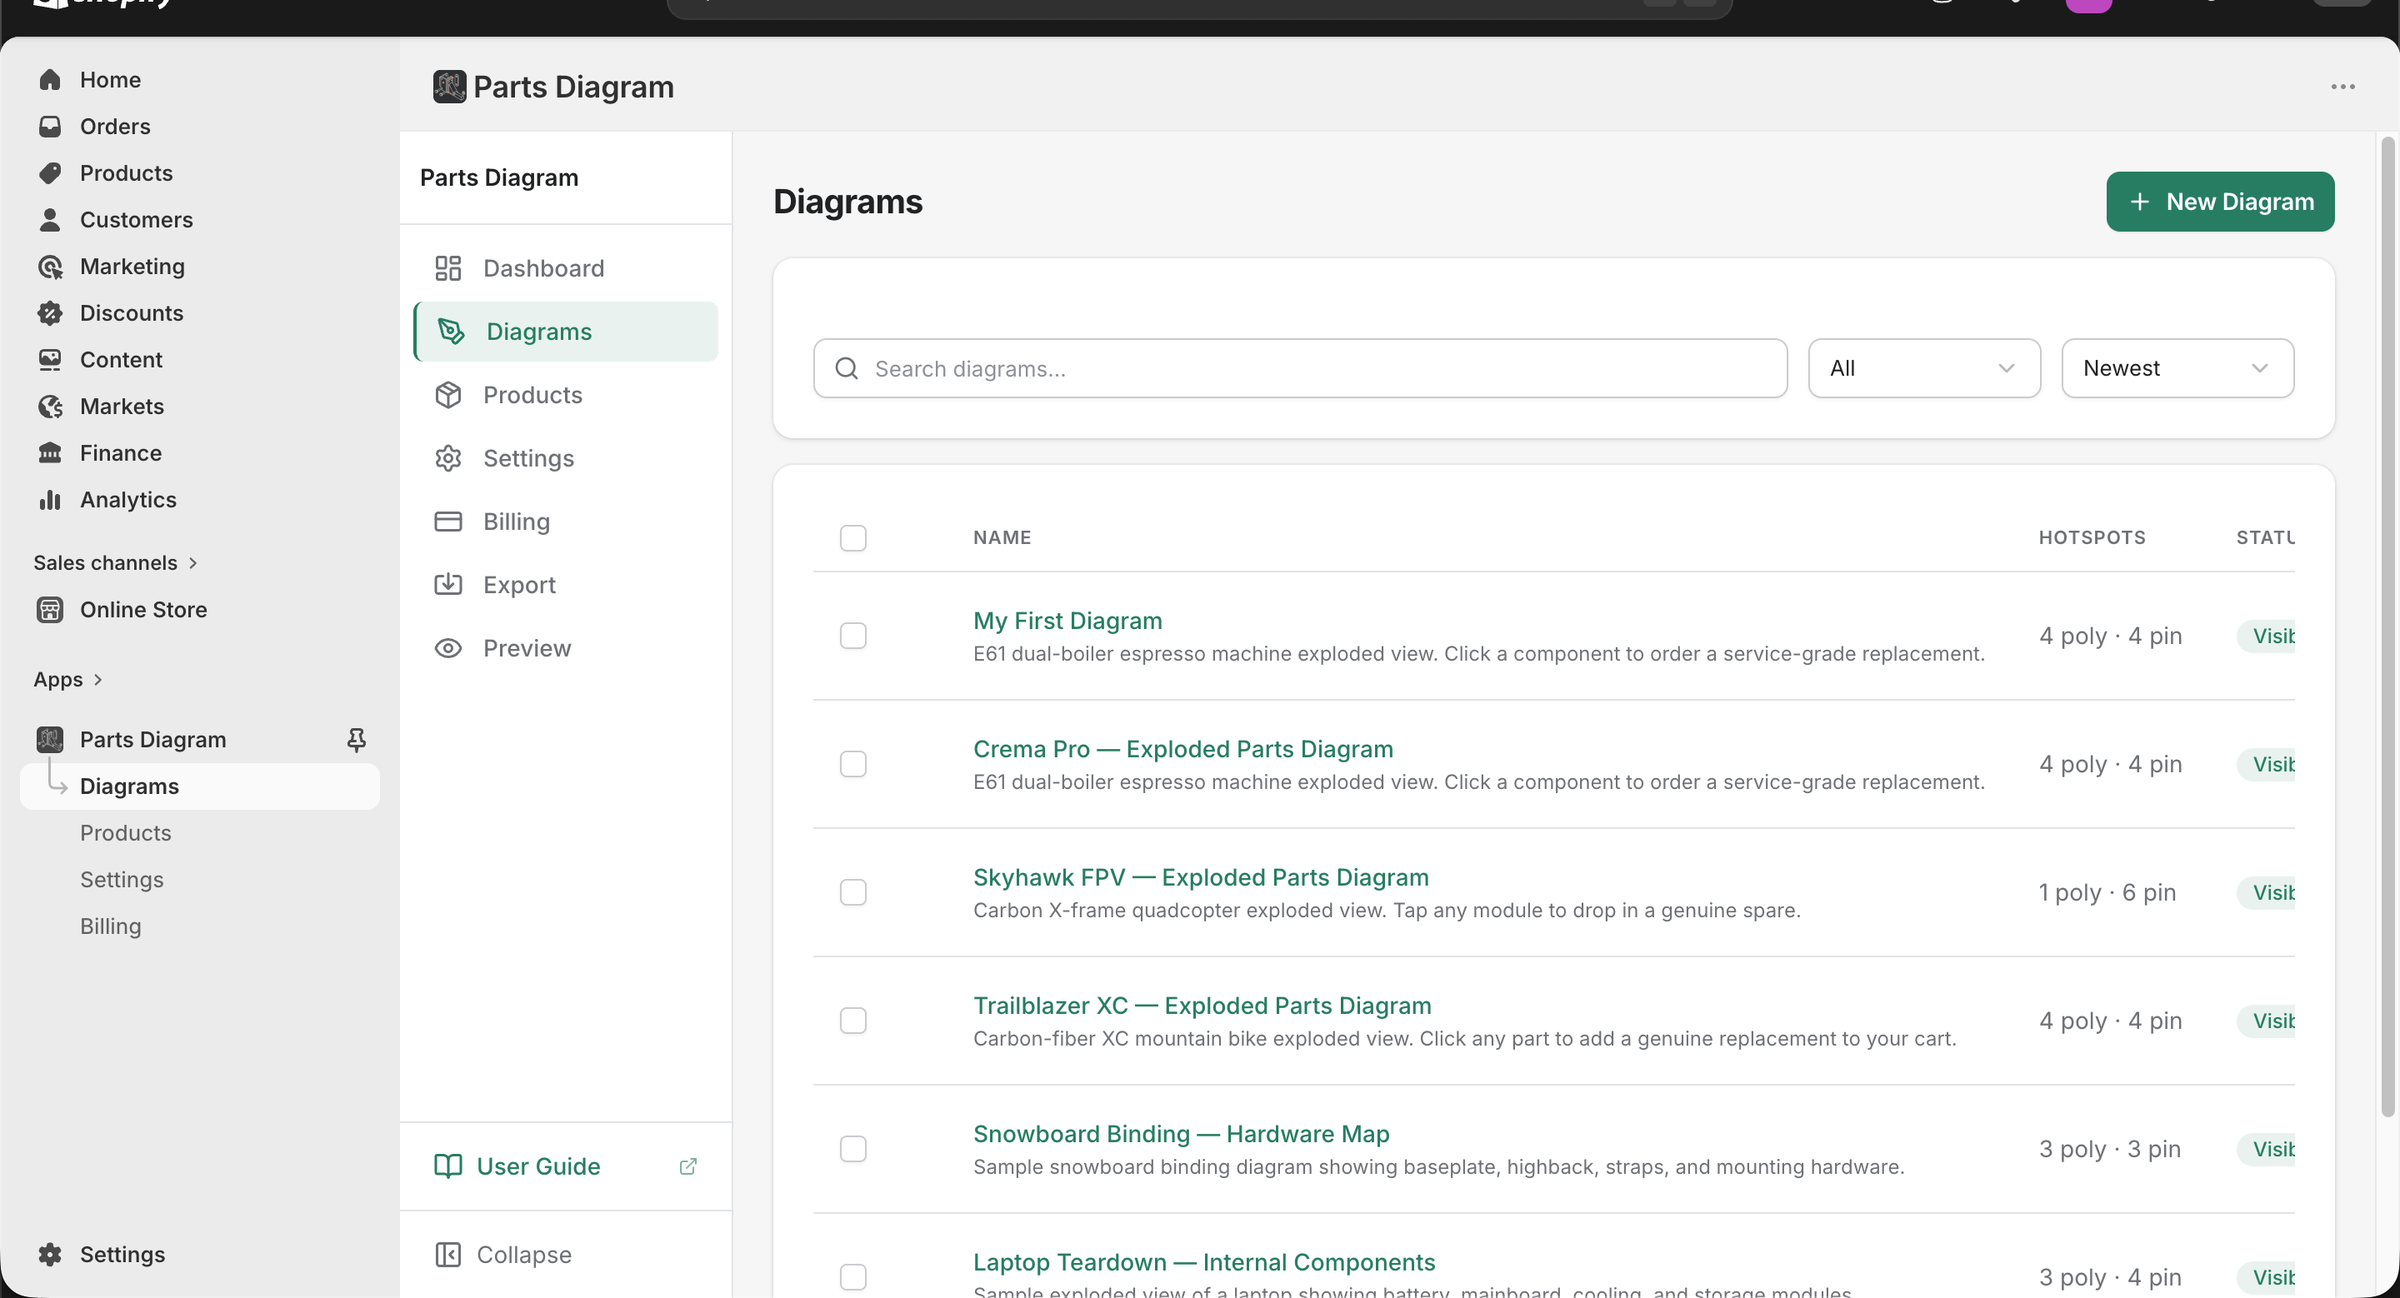
After installing the app, click Parts Diagram in the Shopify Admin sidebar, then click Diagrams.
You'll see the diagrams list. On a brand-new store this will be empty.
Step 2 — Create a new diagram
Click + New Diagram in the top-right corner.
Fill in:
| Field | What to enter |
|---|---|
| Name | An internal label you'll recognise in the list — shoppers never see it. E.g. "Espresso Machine — Exploded View" |
| Description | Optional notes for yourself or your team |
| Diagram Image | Drop or browse to your PNG / JPG file (up to 10 MB) |
| Visibility | Keep Draft while you're building; switch to Visible when ready to publish |

Click Save & Continue →. The app uploads the image and takes you straight into the editor.
Step 3 — Draw hotspots in the editor
The editor has three parts:
- Canvas (centre) — your diagram image with hotspot overlays.
- Toolbar (left edge) — tools for drawing and navigating.
- Inspector (right panel) — properties of the selected hotspot.
- Parts List (bottom panel) — all hotspots in a table with their status.

Add a polygon hotspot
Polygon hotspots are rectangles that highlight a region on the diagram — ideal for large, clearly bounded parts.
- Click the Polygon tool (pentagon icon) in the toolbar, or press
R. - Click and drag on the canvas to draw a rectangle over the part.
- Release to commit. The hotspot is selected and the inspector opens on the right.

Add a pin hotspot
Pin hotspots are single click-points — ideal for small parts where a rectangle would feel cluttered (a screw, a connector, an indicator light).
- Click the Pin tool (map-pin icon) in the toolbar, or press
P. - Click once on the canvas at the exact location of the part.
- The pin is dropped and selected.
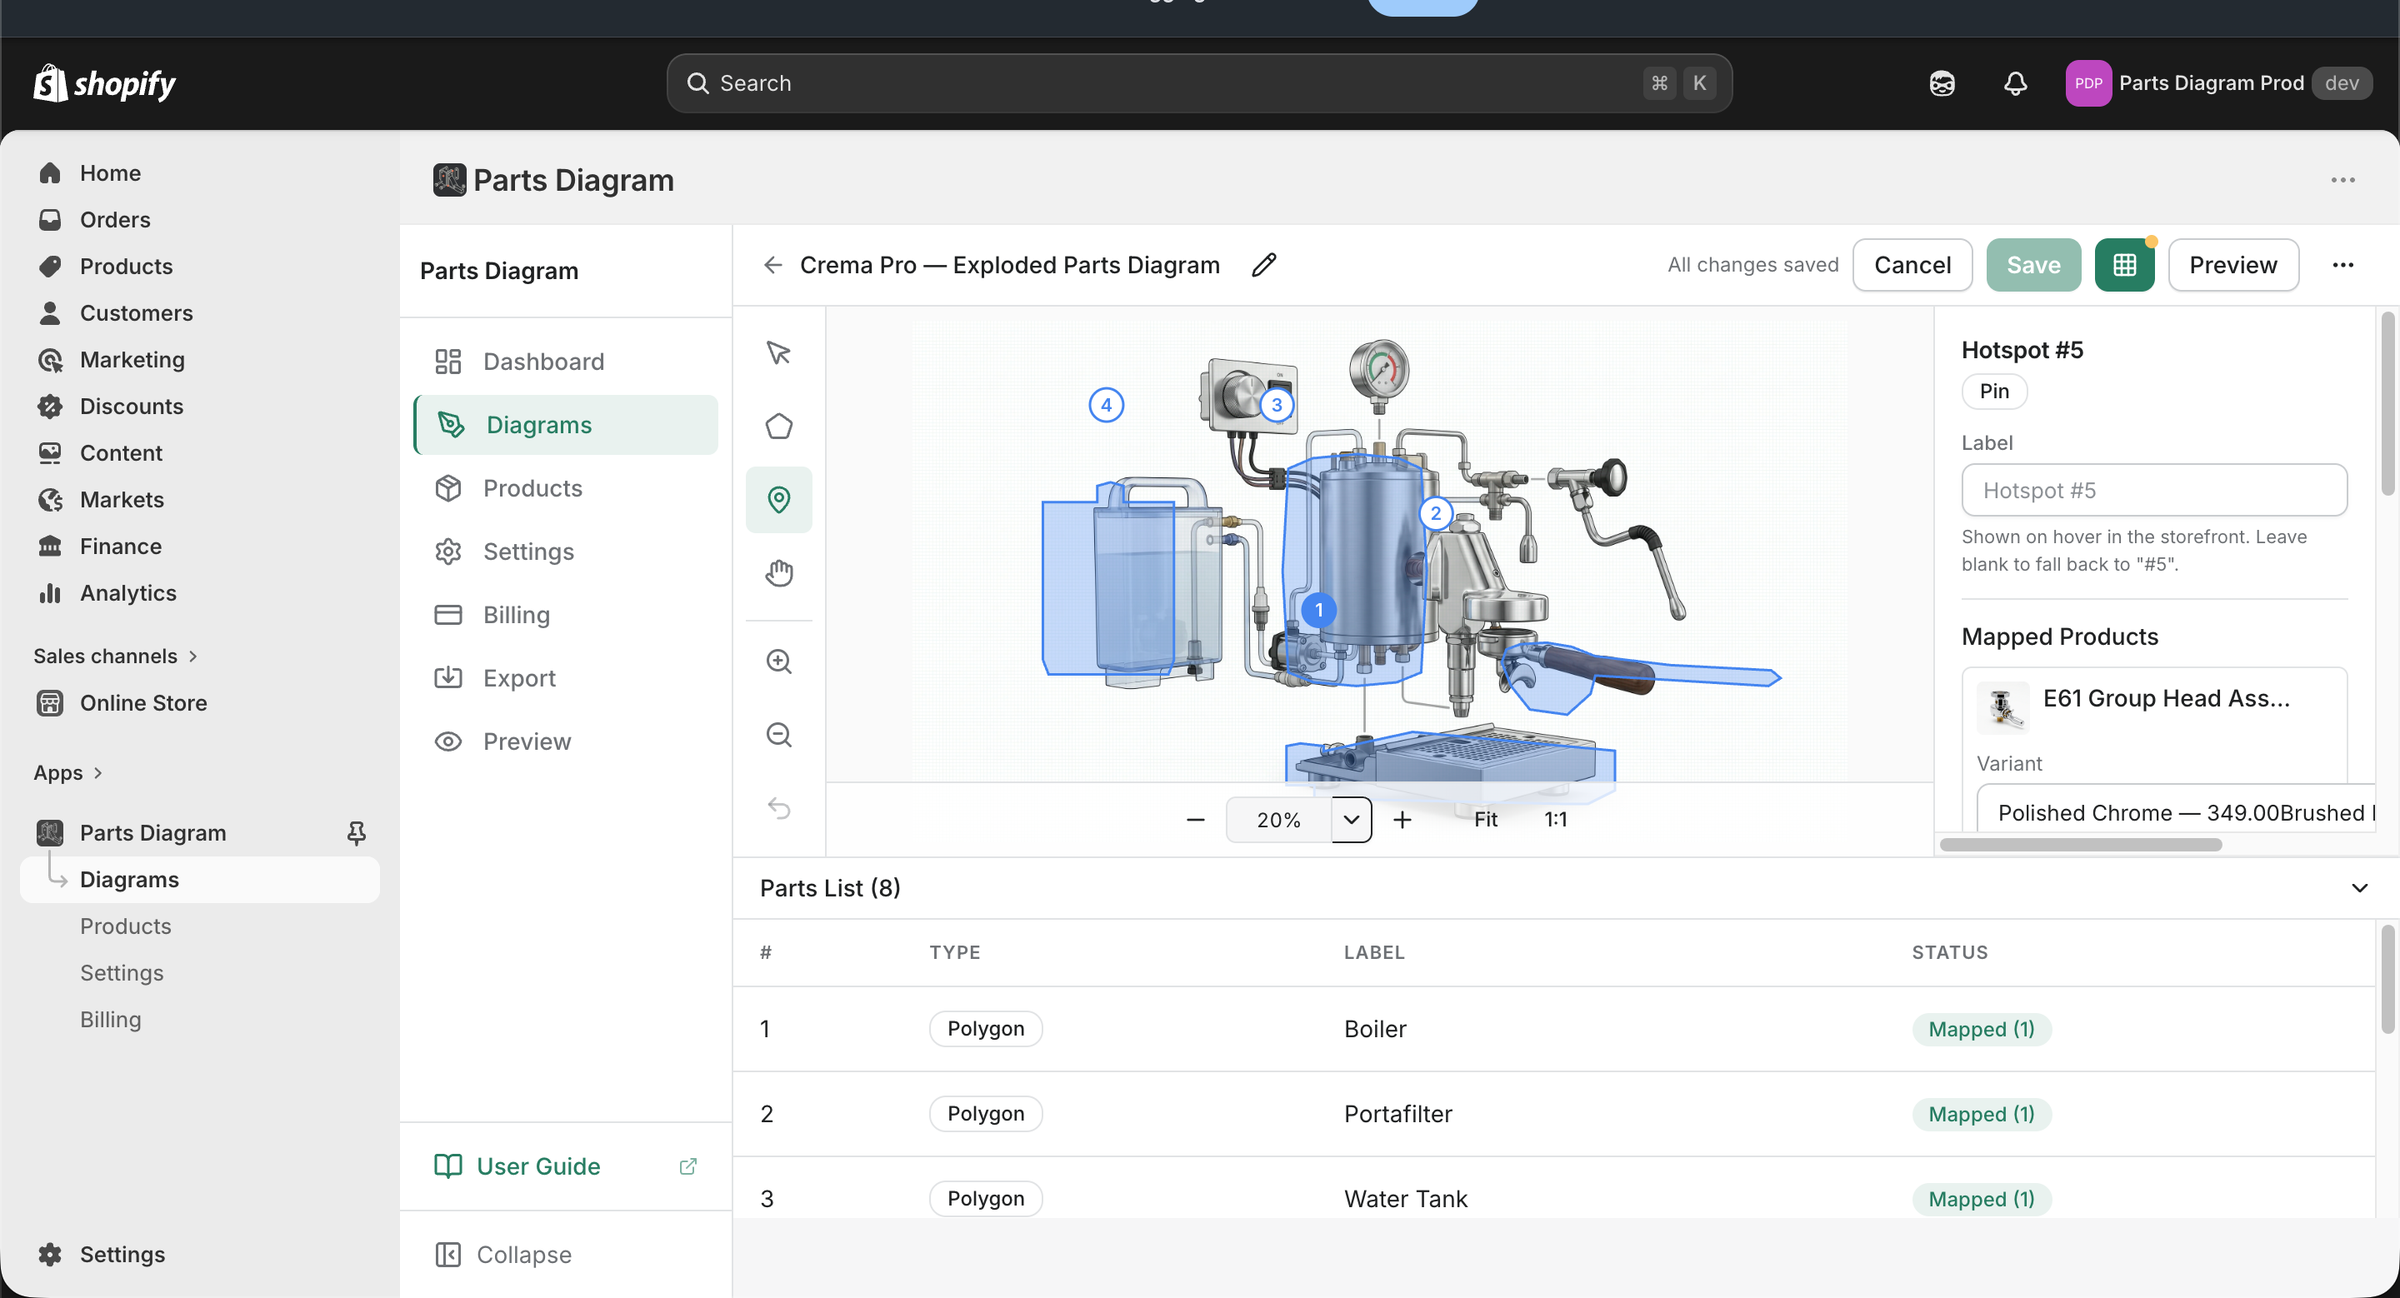
Assign a product to the hotspot
With a hotspot selected, use the Mapped Products section in the right-hand inspector to link it to a Shopify product:
- Click the product search field and type the product name or SKU.
- Pick the matching product from the results.
- If the product has variants, a Variant dropdown appears — pick a specific variant, or leave it on "Any variant" to let shoppers choose in the popup.
- Optionally fill in a Label — a short, shopper-friendly name shown on hover and in the parts list (e.g. "Boiler" instead of the full product title).
The editor auto-saves every few seconds — look for the "All changes saved" indicator next to the diagram title. There is no separate publish button; once saved, changes are live on any storefront page that already has the block added.
Keyboard shortcuts
| Action | Key |
|---|---|
| Select tool | V |
| Polygon tool | R |
| Pin tool | P |
| Fit diagram to canvas | 0 |
| Undo / Redo | Cmd/Ctrl + Z / Shift + Cmd/Ctrl + Z |
| Delete selected hotspot | Delete or Backspace |
Step 4 — Assign the diagram to a product
A diagram only shows up on a product page when it is assigned to that product.
- In the app sidebar, click Products.
- Your Shopify product catalog is listed. Find the product this diagram belongs to.
- Click Add diagram next to it and pick your diagram from the list.
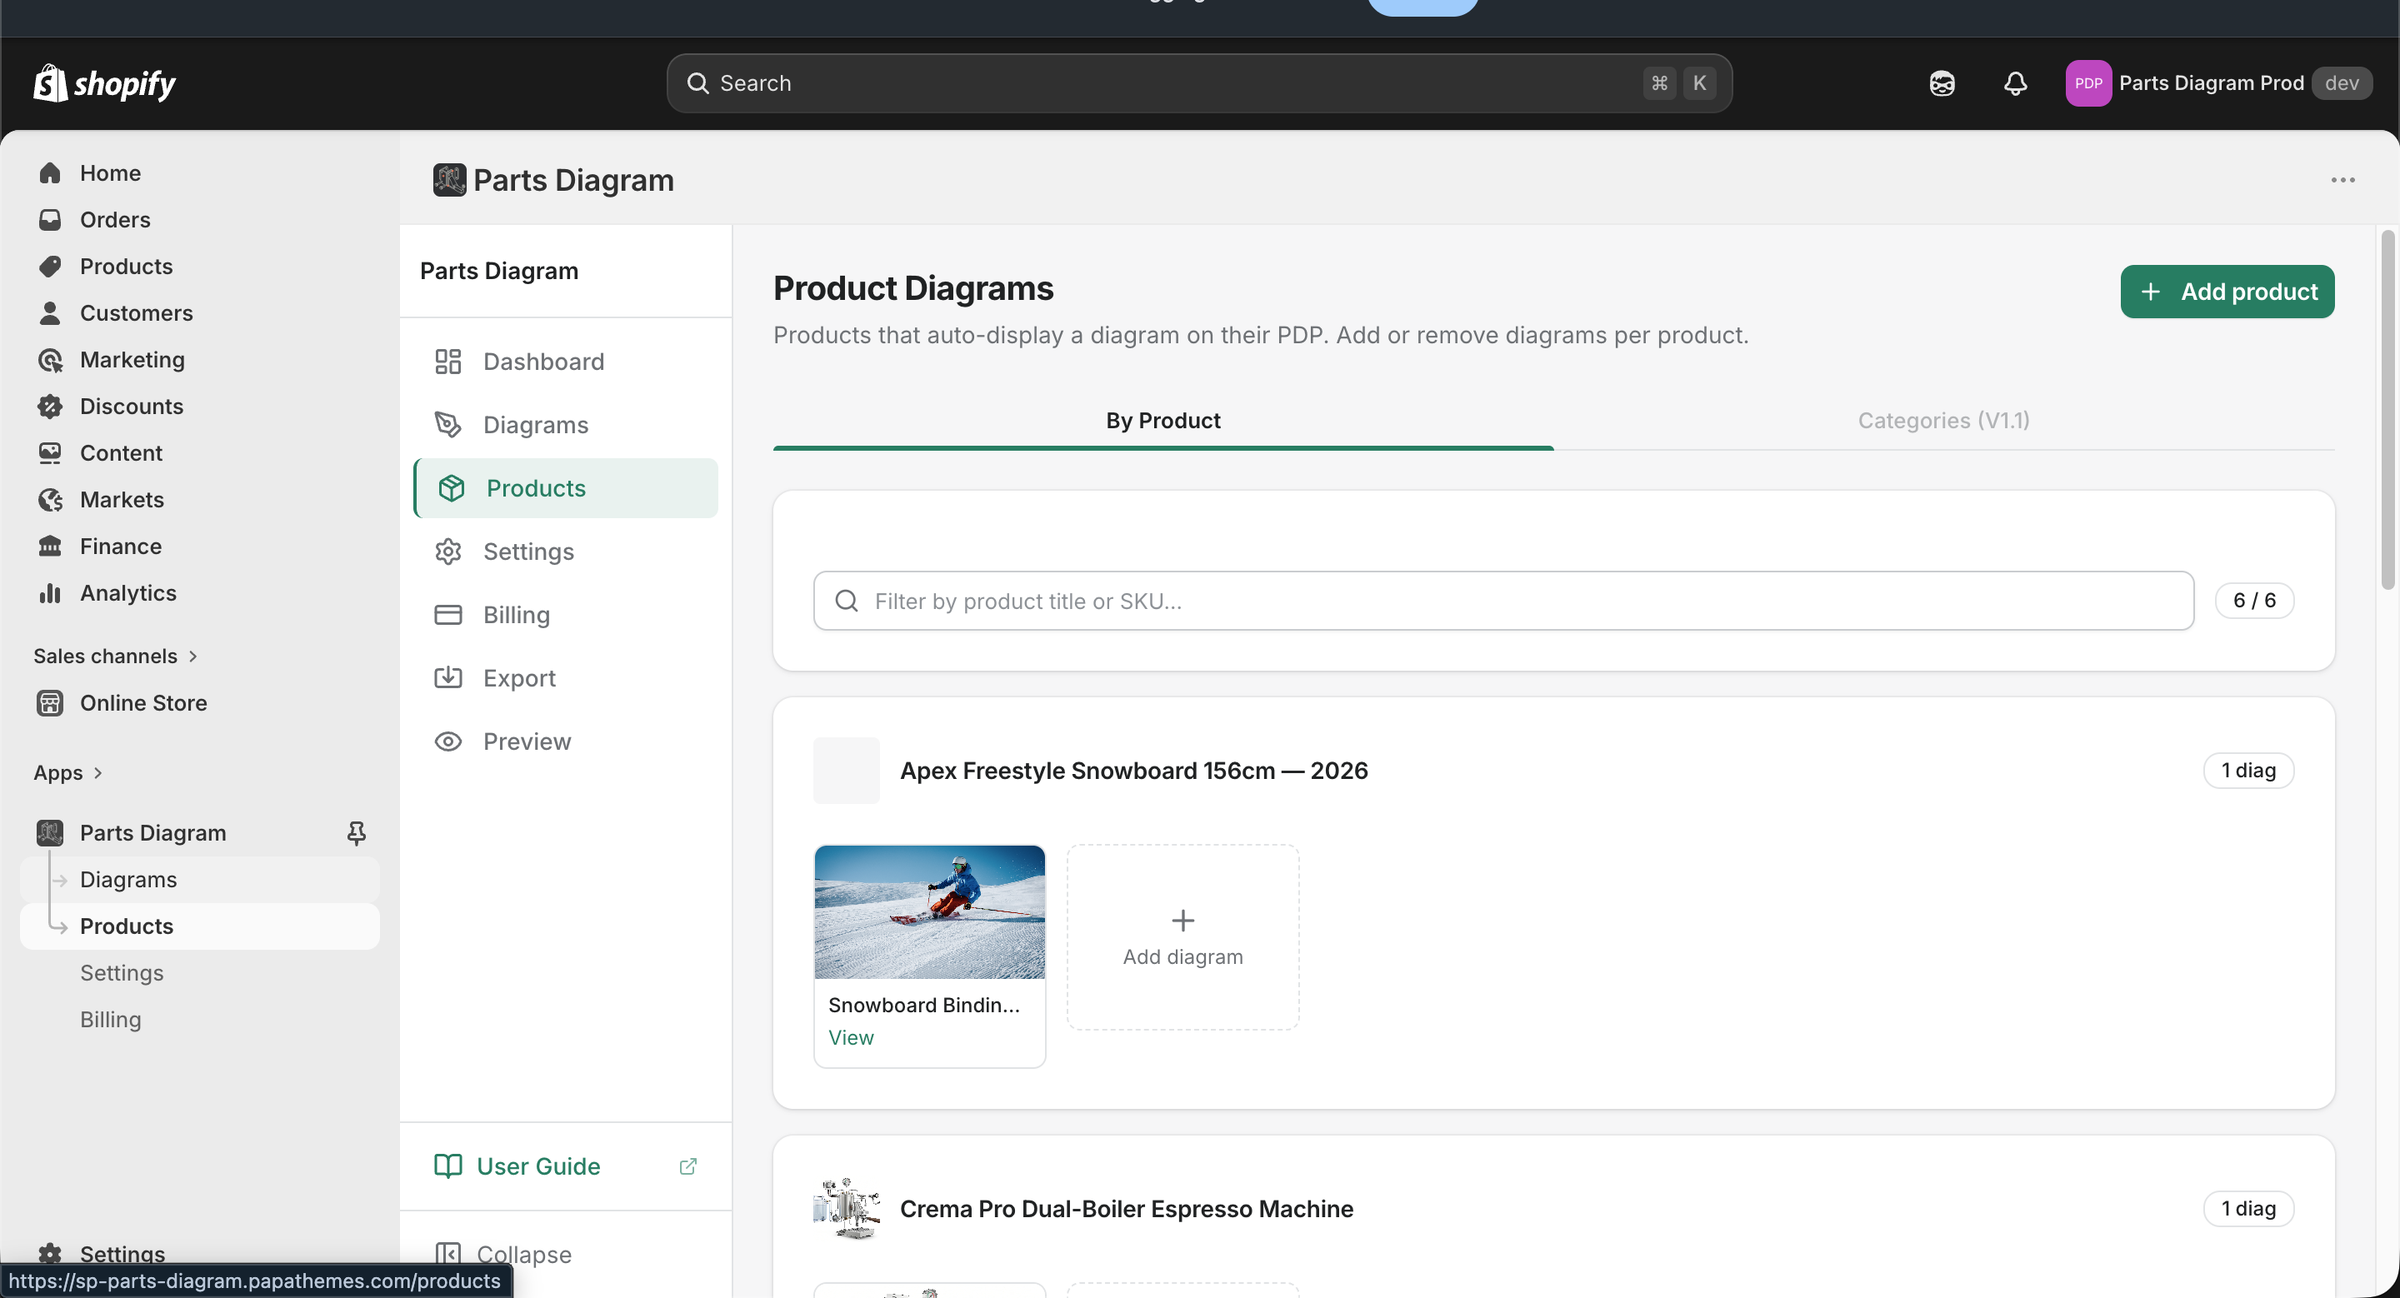
You can assign the same diagram to multiple products, and one product can have multiple diagrams (they appear as tabs on the storefront).
Step 5 — Add the app block to your theme
This is a one-time setup per theme. Once the block is added to your product template, it automatically shows the correct diagram on every product page that has an assignment.
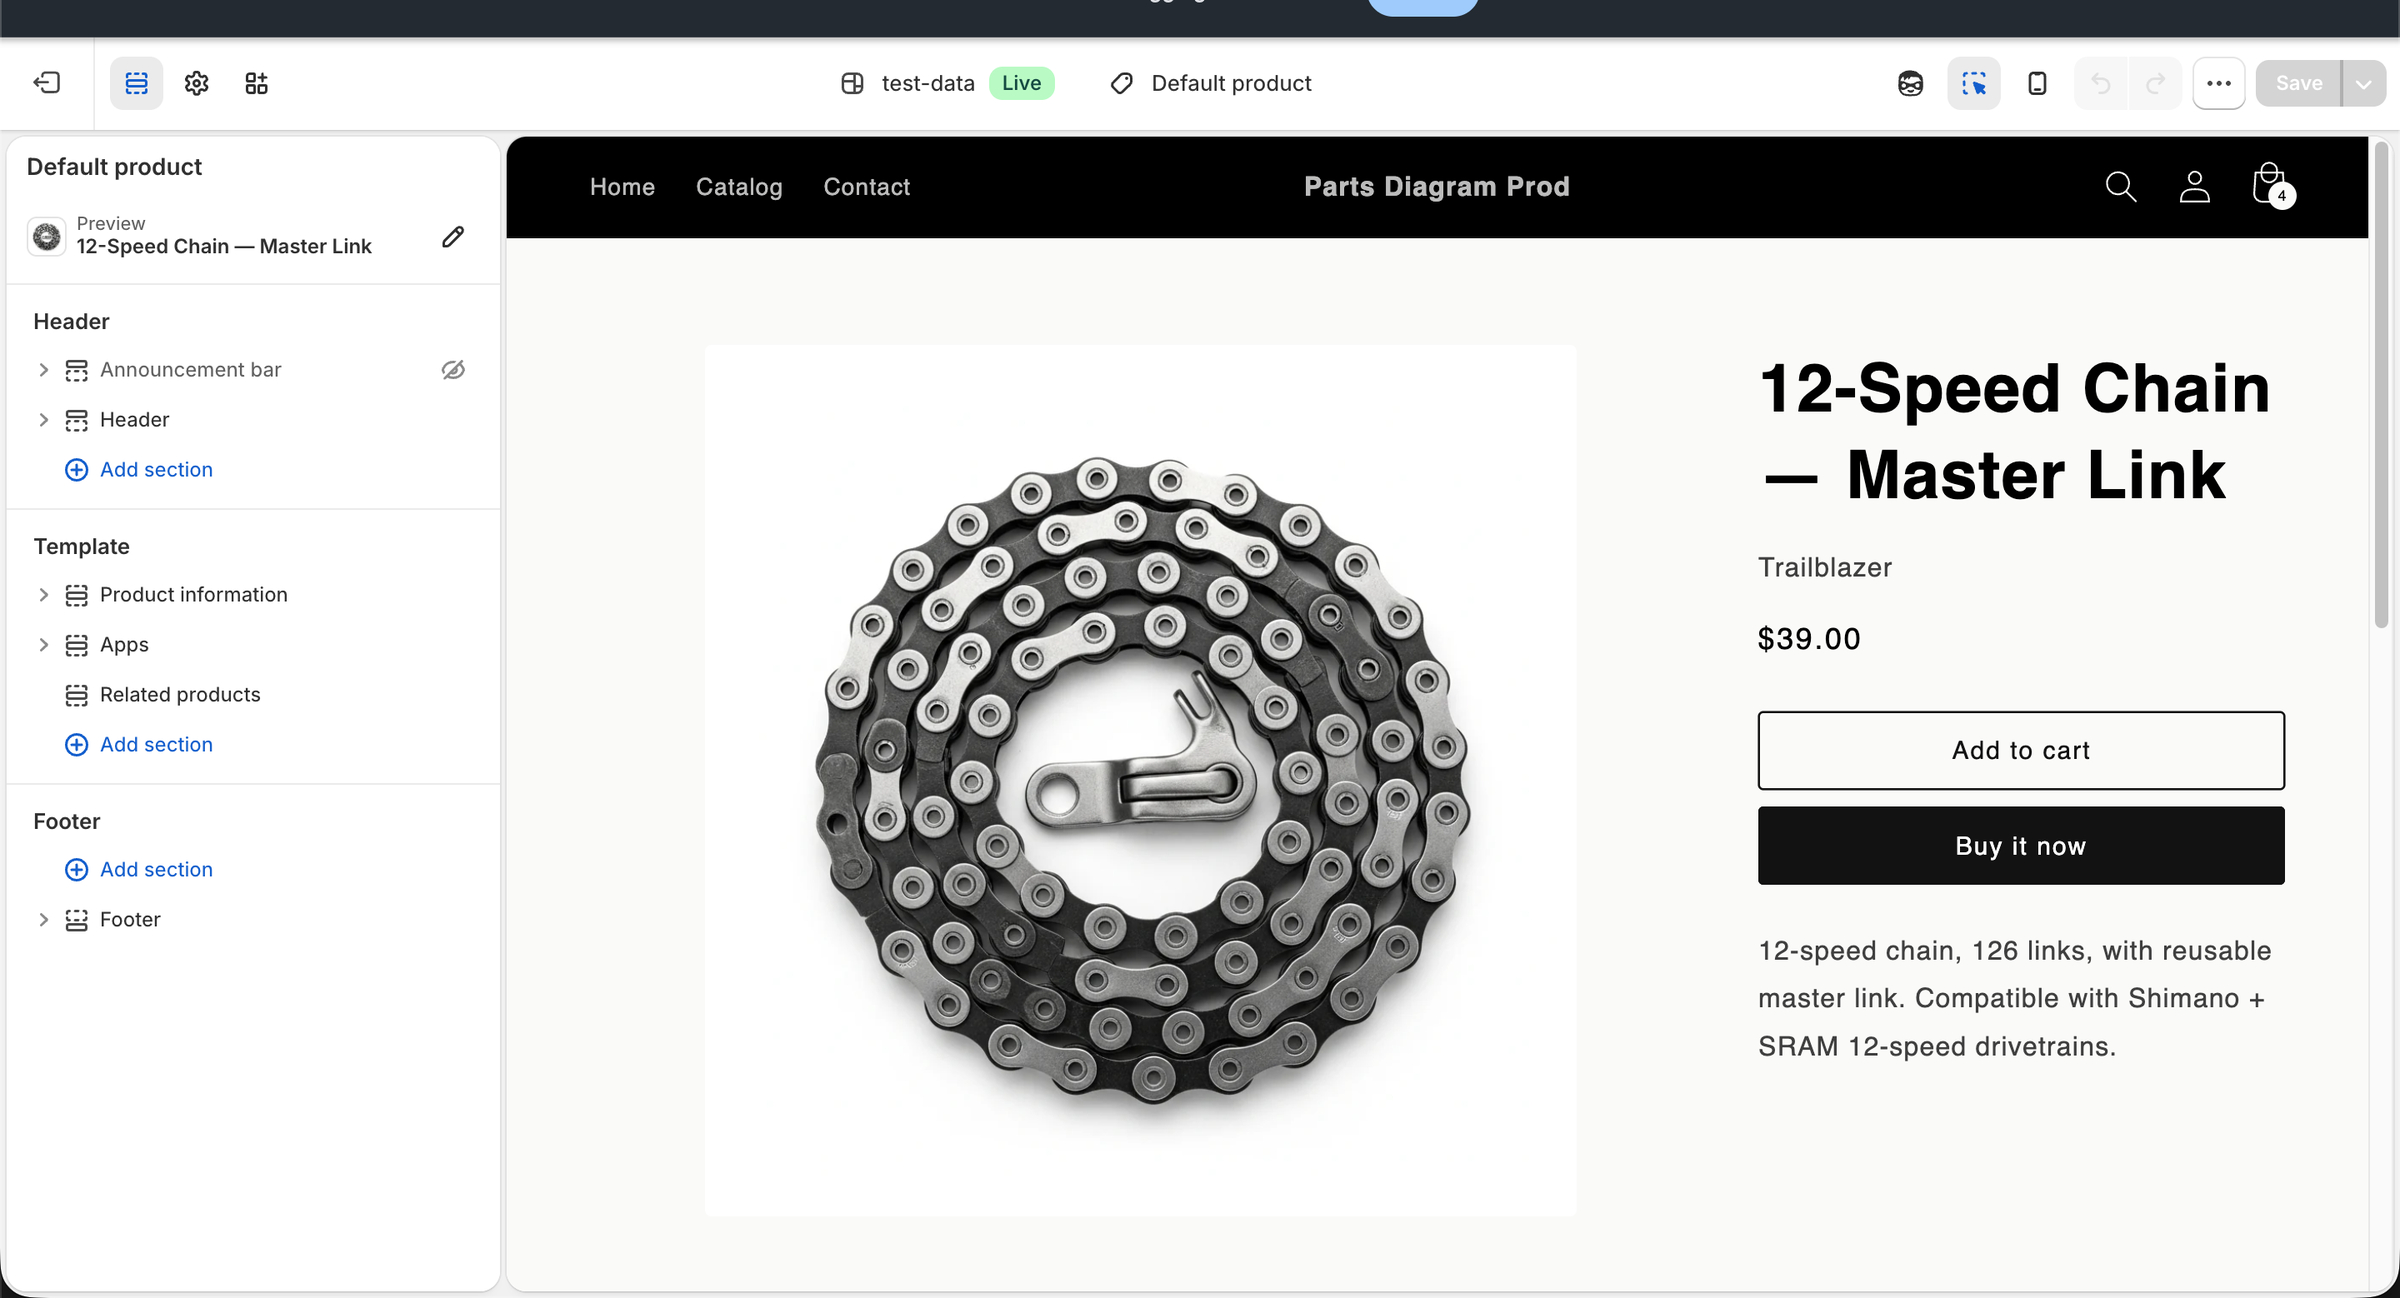
- In Shopify Admin, go to Online Store → Themes and click Customize (or Edit theme) on your active theme.
-
At the top of the customizer, open the template selector and choose Products → Default product (or whichever product template you use).
-
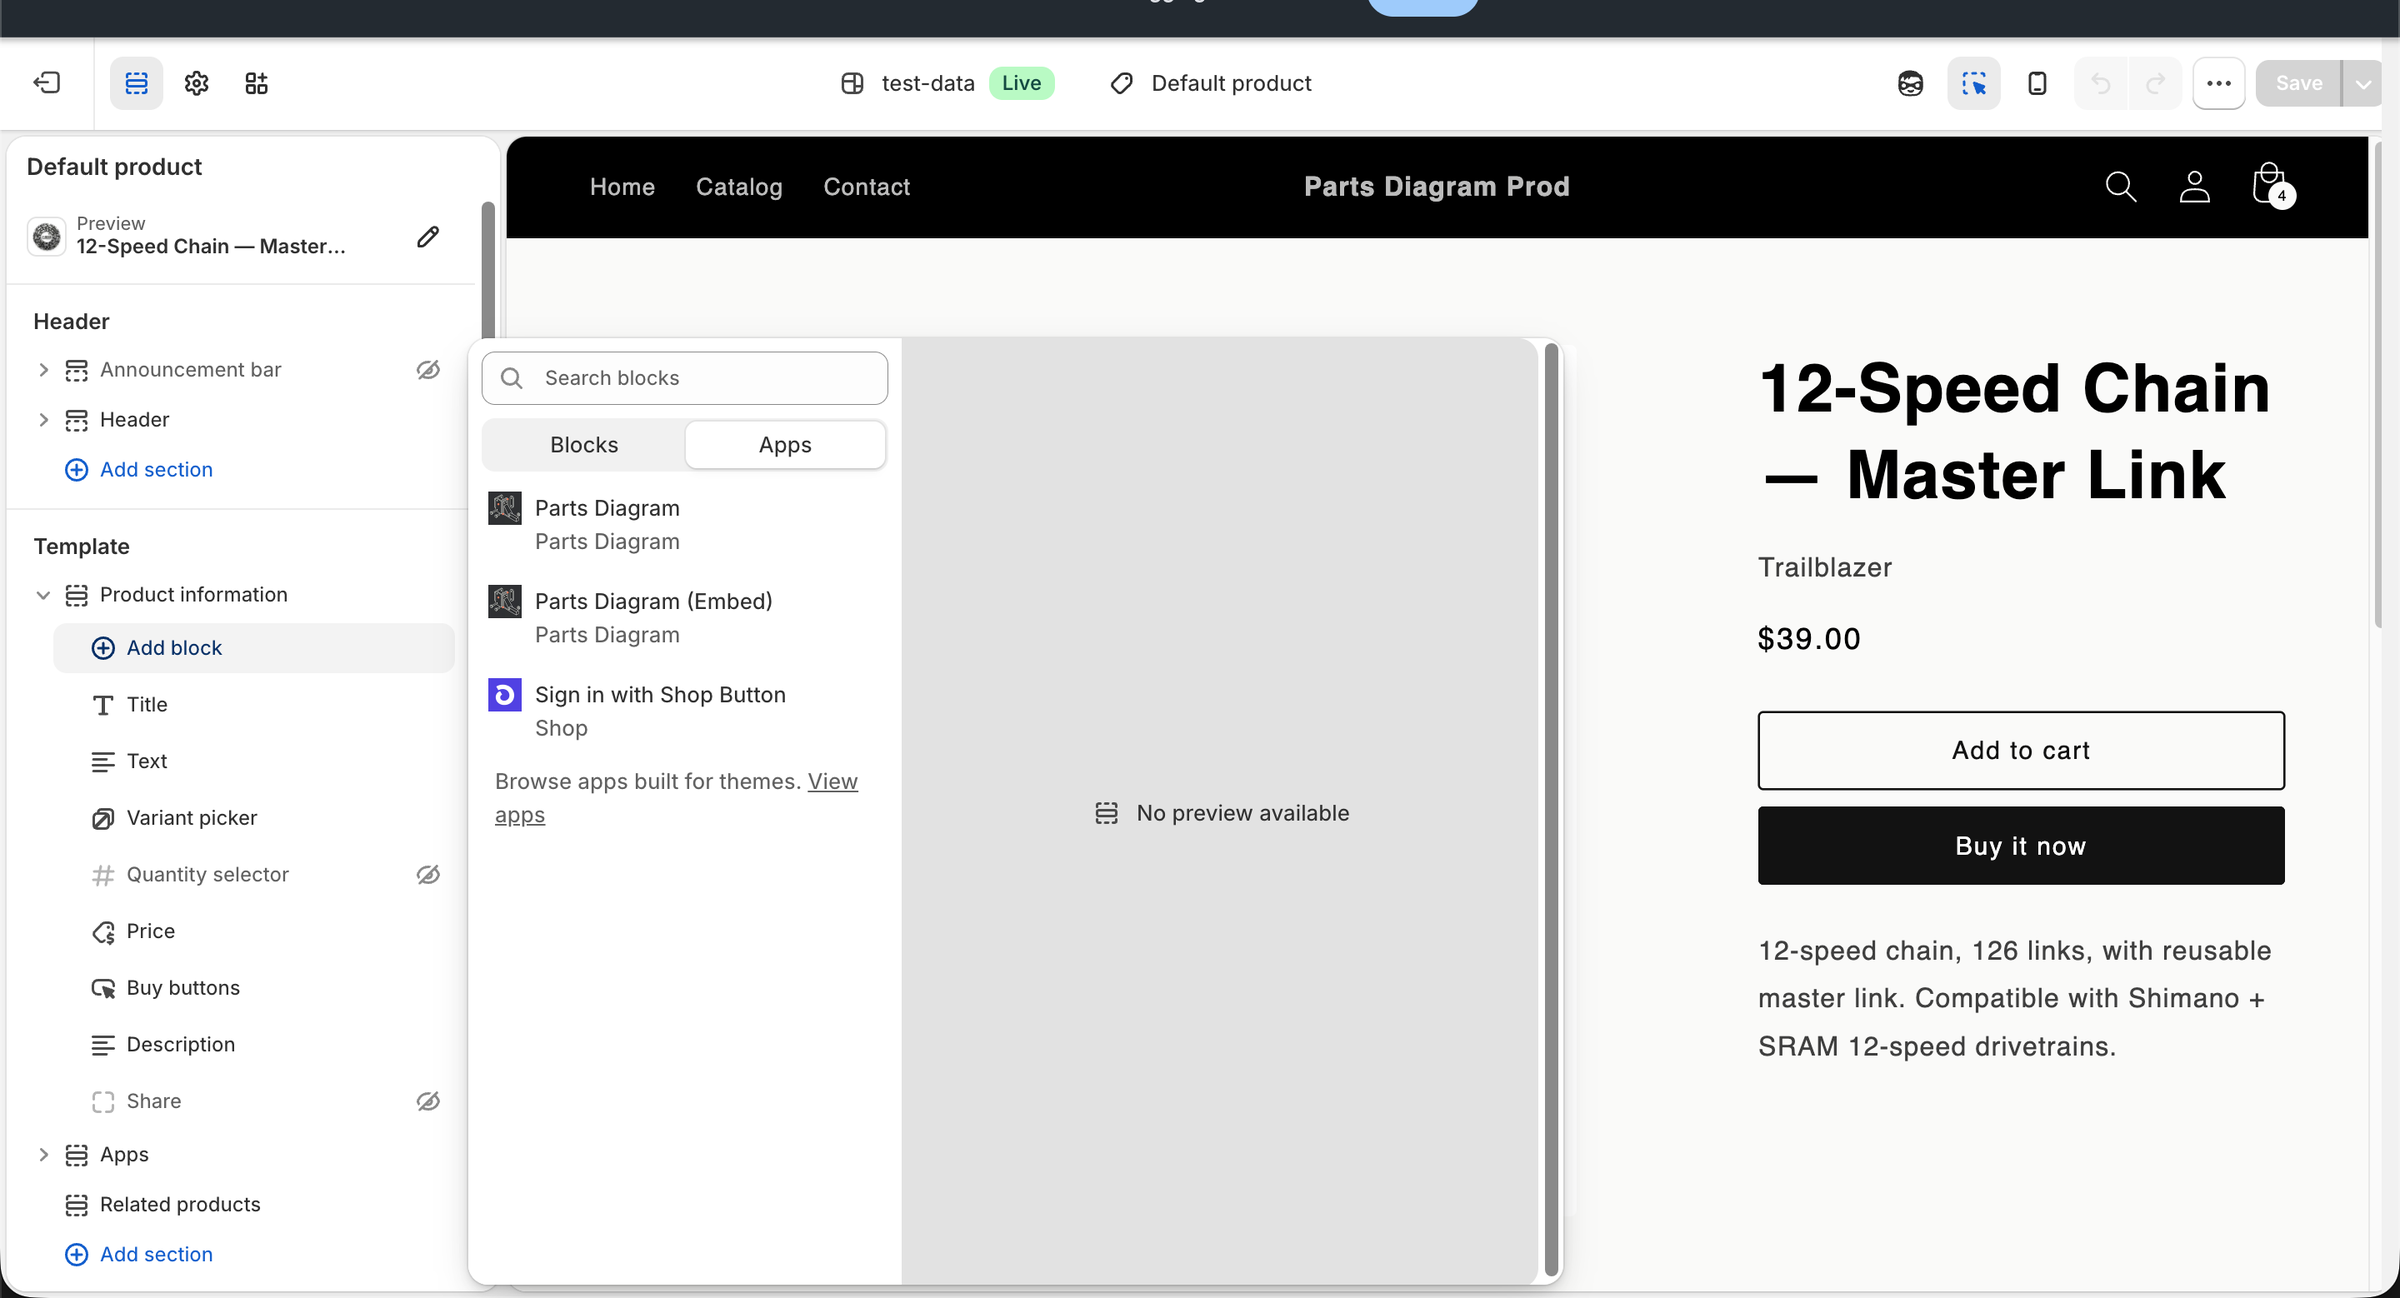
In the left panel, expand the Product information section and click Add block.
- Switch to the Apps tab in the block picker.
-
Click Parts Diagram to add the block.
-
Drag the new block to the position you want (most merchants place it below the product gallery or below the Add-to-cart button).
- Click Save.
Multiple product templates
If your theme uses several product templates (e.g. Default, Apparel, Featured), repeat these steps for each template where you want diagrams to appear.
Step 6 — Verify on the storefront
Open the live product page in a regular browser tab. You should see the interactive diagram below the product information:

- The diagram image fills the left area with numbered hotspots.
- The Parts list on the right shows every mapped part with its price and an Add to cart button.
- Hovering or clicking a hotspot highlights it on the canvas and scrolls the matching row into view in the parts list.
- Clicking Add to cart adds that specific part to the shopper's cart without leaving the page.
Store is password-protected?
If your store is still in development, use the Preview link in the app sidebar, or temporarily disable the storefront password in Online Store → Preferences to test as a real shopper would.
If the diagram is not visible, jump to Troubleshooting.
Next steps
- Tune the storefront look and feel: Storefront settings
- Import diagrams from another store or export for backup: Import & Export
- Watch what shoppers click: Analytics
- Understand billing tiers: Plans & Billing